Today, I present to you a timelapse sequence of the lunar surface during the blue moon eclipse of January 31, 2018. See more from this eclipse.
Capturing the Lunar Surface
Equipment Rental
Wanting to capture detail on the lunar surface, I decided to rent a 400mm lens from the local camera shop. I chose a supertelephoto lens with a maximum aperture of f/2.8. This allowed me to capture a lot of light in a short time, but also meant that the lens would be bigger and heavier than a 400mm lens with a maximum aperture of, say, f/5.6.
I looked around online to find the weight of the lens, then compared that to the stats on both my tripod and ball head. The numbers indicated my equipment could hold this beast of a lens, so I went ahead and rented it.
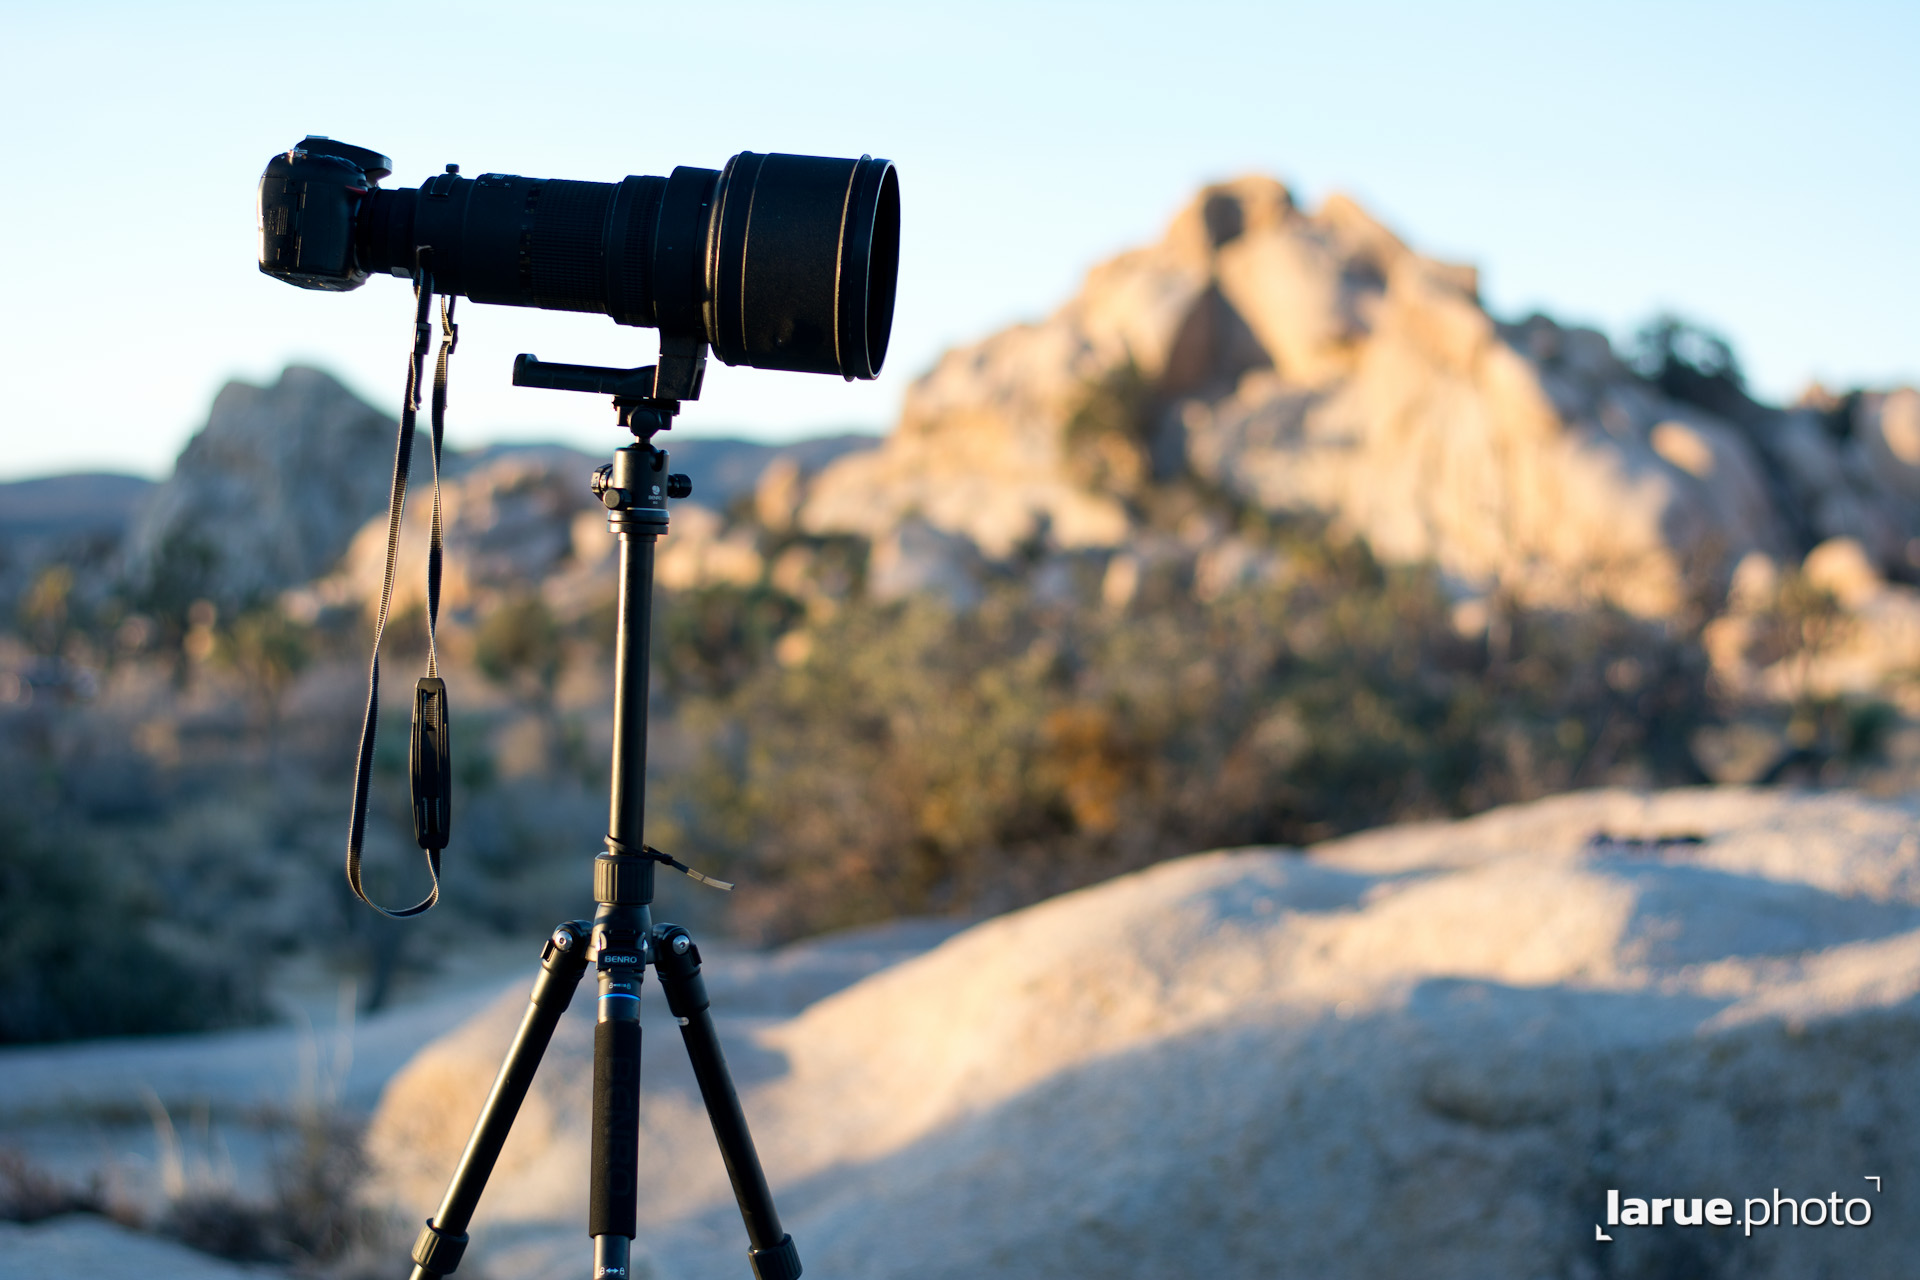
Below I’ve included a photo of the lens in use in the field, and comparison images of the same scene shot with 50mm Vs. 400mm lenses.
400mm lens with Nikon d7000 on Tripod
Timing
I spent most of the night watching the clock. Time management was the nights theme. I knew what I’d be doing each second for a 5 hour span of time. Eclipse timings are calculated years ahead of time, so I created a table of all the eclipse timings and how I wanted to handle the changing light. It was important to me to anticipate the changing light so I could compensate my camera setting accordingly; to change settings smoothly over enough exposures that the change felt natural. I didn’t want any flicker or sudden changes in light.
I kept my cellphone open to a digital clock (with seconds), told the screen to never timeout, and watched that thing like a hawk for 5 hours.
Capture Notes
Capturing these images took some serious focus and dedication. I was juggling not only this lunar surface sequence, but two others as well. One for the lunar path, and the other for the cast light on the landscape behind me.
For the lunar surface sequence, I set the camera’s interval timer to capture an image every 60 seconds. That may not sound very frequent, but they get to coming fast. The moon moves through the sky pretty quickly, especially when looking through a telephoto lens. I needed to adjust the tripod every 4-5 minutes to keep the moon in frame.
This meant that any adjustments I needed to make to either of the other two sequences needed to be made within that 4 minute window. And unfortunately, because of the compositions I chose, I was not able to position the cameras right next to each other. They were about 50 yards away in opposite directions of the lunar surface camera.
So I spent much of the night jogging between cameras to make sure everything was running correctly, and making minor adjustments, while trying to get back to the center camera before the moon left the frame. I estimate I covered over 2.5 miles that night walking between my 3 cameras.
Post-Production Notes
Finding an Automated Alignment Method
Turning my captures into a finished product was a labor intensive endeavor. I needed to get all 223 exposures to line up as closely as possible, accounting for movement on the X & Y axes as well as rotation.
At first I tried a few different techniques to automate the process. AfterEffects’ Warp Stabilizer, Premiere’s Stabilize Motion, Photoshop’s Auto Align. But they all struggled because of the changing light conditions surrounding the eclipse.
Aligning Manually
I ended up manually positioning and rotating each of the 223 images in Photoshop.
First I cropped all the images into tight squares that showed little more than the moon. Then, I loaded all the images into a stack (Scripts -> Load Files Into Stack) without Auto Align Layers. I reviewed the image positions and picked a reference frame which seemed to be in the same position as a majority of the other images. I put this reference frame at the top of the layers palette, changed its Blending Mode to Difference, and locked the layer.
Then the fun begins. One by one I turned on a layers visibility and moved and rotated it to align with the reference layer. After I had aligned 10 or so, the lighting had changed enough on the lunar surface that a new reference photo was needed. So, like a climber switching to a new harness line, I would make sure my new reference image was aligned properly, change its blending mode to difference, lock it, find the previous reference photo, unlock it, change its blending mode to normal, the change the visibility to off. In this way I was able to always have a visual cue of where I was in the process, in case my memory ever fails. [a frequent occurrence]
Feedback
So, what did you think? Did I explain my process clearly? Is there an easier way to do this that I can employ next time? Tell me in the comments. Connect with me on Facebook and Twitter to stay informed of my most recent updates.


Leave a Comment